Integrating ProFile T1 Invoices into QuickBooks Desktop
by Intuit• Updated 1 month ago
Integrate ProFile and QuickBooks Desktop
Before you begin! Make sure ProFile and QuickBooks Desktop are on the latest update and release.
- Open both QuickBooks and ProFile applications as an Administrator. Help ensure that a valid company file is open.
- Open or create a return in ProFile.
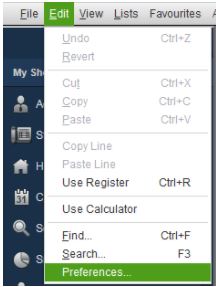
- In QuickBooks, select the Preferences option from the Edit dropdown menu.
- Select Integrated Applications, and then select Company Preferences.
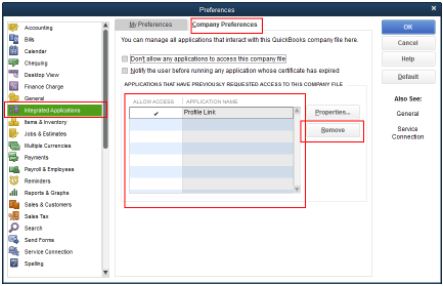
- If ProFile is in the list of integrated applications, select it and then choose Remove.
- Select OK.
- In ProFile, select Option and then Integration... from the dropdown menu.
- Browse for the QuickBooks file and select it.
A window will displays in QuickBooks.
- Select Yes to grant ProFile access.
- Identify the question Do you want to allow this application to read and modify this company file?
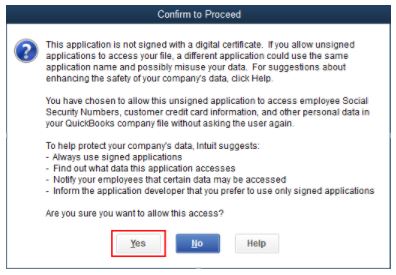
- Select Yes, always, allow access even if QuickBooks is not running, and then select Continue. The Confirm to Proceed window will display.
- Select Yes to grant access.
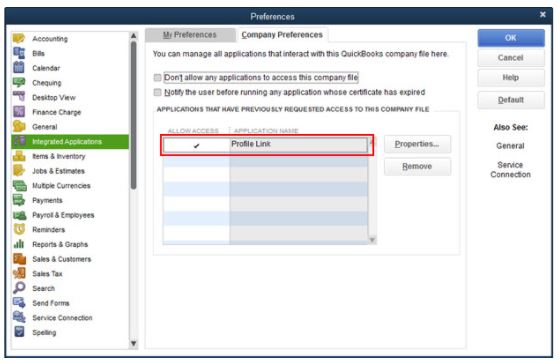
ProFile will display as an integrated application in QuickBooks.
- Open ProFile, navigate to the Billing form, and right-click.
- Select Create invoice in QuickBooks from the menu.
Unable to log into company data file error
If you get an error when browsing for the QuickBooks Desktop file that says you can’t automatically log into the company file, follow these steps.
- In QuickBooks, select Edit and then Preferences option from the dropdown menu.
- Select Integrated Applications, and then select Company Preferences.
- Select ProFile in the list of integrated applications.
- Open the Properties tab.
- Select Access Rights. Check the box for Allow this application to read and modify this company file and Allow this application to login automatically.
- Select OK and then proceed with steps 8 to 14.