Import client data for T2 returns directly from the CRA via Auto-Fill My Return in ProFile
by Intuit• Updated 4 months ago
Auto-fill My Return (AFR) is a secure CRA service. It helps authorized representatives to electronically request and receive certain client tax information from the CRA.
ProFile customers can check the data they downloaded from the CRA for accuracy and completeness. Then, they can add the data they want to into a T2 return. This helps verify the client’s tax data against CRA records.
T2 AFR is available starting for the 2016–18 T2 module and going forward, and is available for up to four previously filed years.
The T2 AFR service doesn't import GIFIs for the S100 and S125.
Table of contents:
| ‣ Get access to client data for T2 AFR |
| ‣ Download CRA client data |
| ‣ Selecting and transferring data |
| ‣ Viewing transferred data in the return |
| ‣ Undoing data transfer |
Get access to client data for T2 AFR
The preparer can EFILE formBusiness Consent in T2 module and obtain online access for the client’s Business Number.
There are other methods to obtain permission. Per the CRA website:
For business clients, representatives are now able to send business authorization requests electronically at their convenience. With an active RepID, a representative can log in to Represent a Client to send an electronic authorization request. To complete a request, representatives must give all the information they need during the electronic authorization process. They must also scan and send a signed and dated certification page from their client. The information is reviewed, validated, and processed within five business days after CRA receives the electronic authorization request and certification page.
Business owners can go to My Business Account and enter your RepID to authorize you as an individual, a GroupID to authorize a group of representatives, or the BN of a business to authorize all its employees.
For offline access, business owners can authorize you as a representative by completing AUT-01 Authorize a Representative for Offline Access, and sending it to their tax centre.

Download CRA client data
- Open a T2 return.
- Enter the minimum of the client’s Business Number in the return.
- Select the Autofill my return (AFR) option from the File dropdown menu in the top toolbar. The CRA Data Import window opens.
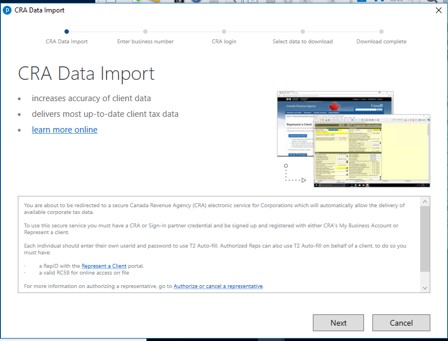
- Review the CRA usage agreement and select Next. The Enter client business number window will open.
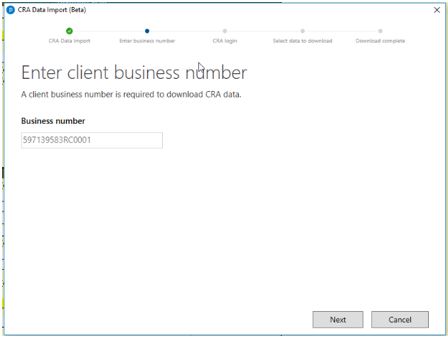
- Enter the client’s Business number and select Next. The CRA login window will open in a new window and the instructions will display.
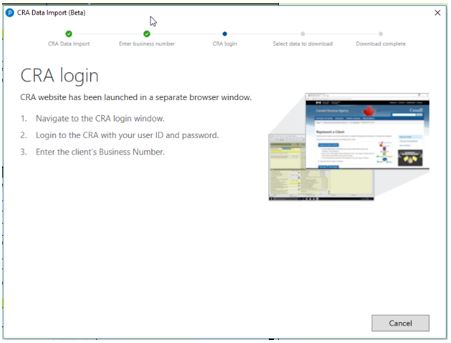
- Enter the CRA login information in the login window and select Login. The CRA client data downloads.
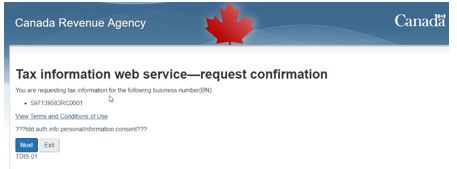
- Make sure the CRA data request information is correct and select Next.
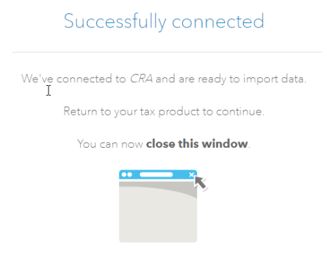
A Successfully connected window displays.
- Return to the ProFile window, where a list of available client data options displays.
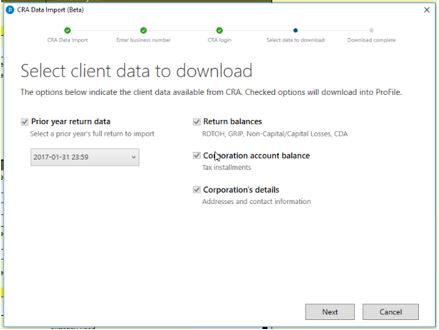
Note: All data download options are automatically select; preparers can unselect some selections to exclude those data options.
- Select an option under the prior-year return data heading. Note that only one previous year at a time can be downloaded.
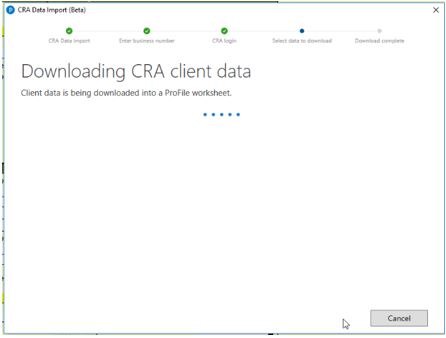
- Select Next. The CRA client data downloads into a ProFile worksheet.
The data displays in a ProFile worksheet.
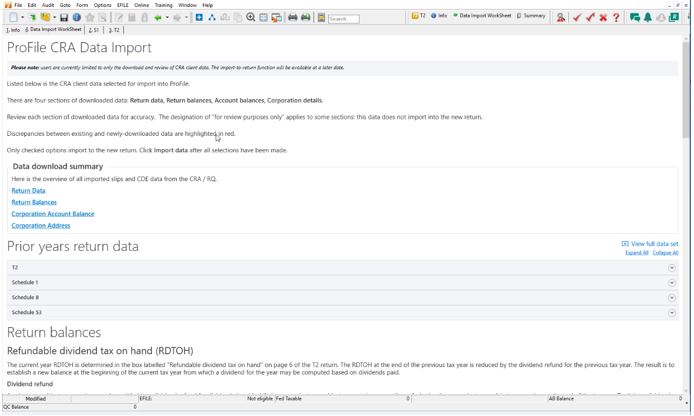
- Review the downloaded data for accuracy and completeness. Errors in data display in red text.
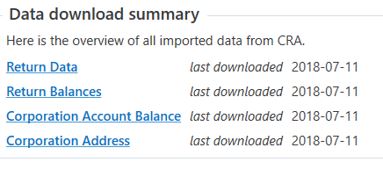
The Data download summary shows the last-downloaded date of the data.
Selecting and transferring data
Each data component in the worksheet includes a checkbox that preparers may select to copy data to the T2 return.

Note: The following data components are for viewing only and do not transfer data to the T2:
- Capital gains and losses amounts (CGLA)
- Capital dividend account (CDA)
- Corporation account balances
- Select the individual data component to copy to the T2 return.
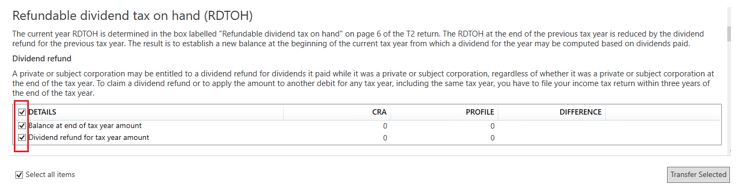
- Alternatively, select all data components with the Select all items checkbox.
- Select Transfer Selected. A confirmation message displays.
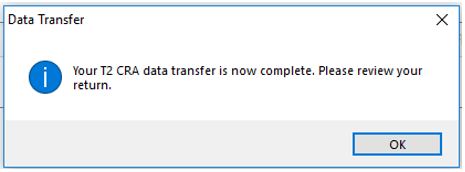
- Select OK to continue.
The selected data transfers to the T2 return.
Viewing transferred data in the return
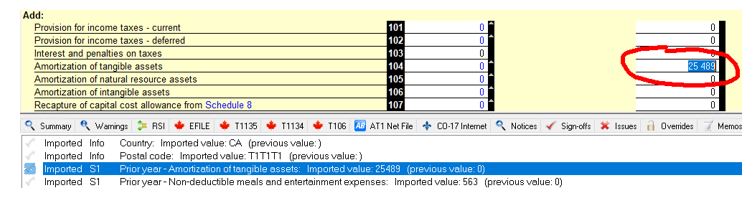
Note: Copied data appears under the Summary column with the Imported status.
- Find to the Data Import tab in the ProFile Auditor in the T2 return.

- Double-click a line with the Imported status—the data that copied to the return displays.
Undoing data transfer
Note: This process removes all the data copied to the T2.
It may be necessary to undo a data transfer.To do this, follow the process below:
- Find to the Data Import tab in the ProFile Auditor.
- Right-click on the imported data summary.
- Select Undo Data Import from the menu.
All copied data is removed from the T2 return.
More like this
- Import data for T1 returns directly from the CRA via Auto-fill My Return (batch and single returns) into ProFileby Intuit
- Recommended use of RQ Import and Auto-fill My Return for Quebec residency clients using ProFileby Intuit
- Information imported through Auto-fill My Return (AFR) to T1 returnsby Intuit
- Create a T1 returnby Intuit