Create a T3 return in ProFile
by Intuit• Updated 4 months ago
The QuickStart dialogue displays automatically when starting ProFile.
Each available module occupies a tab along the top of the QuickStart menu and expands to a list displaying previous tax years. To access this, follow these steps:
- Select the appropriate tax year under the T3/TP646 tab.
- Select Create a new in the QuickStart menu. A new T3 return will open.
Below is additional information to help you create a T3 return:
Table of contents:
Data entry and flow for T3 returns
The T3 Info form contains sections for general information, trust type, and other basic details of the trust.
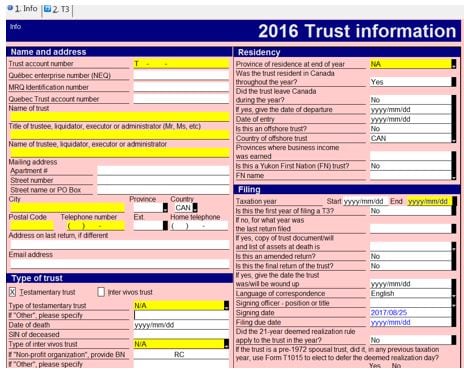
Preparers report the income and deductions of the trust. Enter these details on the various income and deductions forms, schedules, and on the T3 Jacket, which has some edit fields with no supporting schedules.
You'll find a variety of data entry forms, such as business and rental statements, Schedule 1 and T3 dispositions, and T5 income received by the trust.
If the trust is allocating income to its beneficiaries, the forms in the Beneficiaries tab of the Form Explorer become important.
Any income not allocated to beneficiaries is taxed on Schedule 11, which transfers to page 4 of the T3 jacket.

Using the Allocation worksheet
The Allocation worksheet is used to complete the slip amounts for beneficiaries.
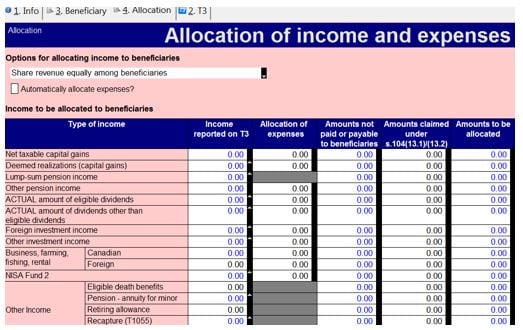
Use this worksheet for the following:
- To tell how you want the money to be split between the beneficiaries, the default is that each one gets the same part of the money. If not, select Other and enter the percentage applicable to each beneficiary on the Beneficiary details worksheet. If Other is selected, the percentage field on each slip of the Beneficiary worksheet becomes an input field. Otherwise, it's calculated based on an equal allocation to all beneficiaries.
- If the trust has claimed expenses at line 41 of the return, the expenses have to be applied to specific types of income before the income can be allocated to a beneficiary. These expenses must be applied manually. An audit message will appear if these expenses haven't been entered.
- To retain some of the income to be taxed in the trust. You can specify which type of income and how much is to be retained by the trust.
- Enter amounts for specific boxes on the T3 slips that ProFile T3 doesn’t fill in automatically. This includes items like foreign income, tax paid, or cases where the trust is allocating a retiring allowance or death benefits. Add those details here.
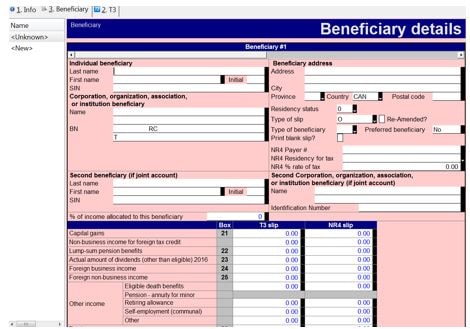
Using the Beneficiary worksheet
On the Beneficiary worksheet, enter details such as name, address, and residency of the beneficiary.
The slip amounts of this form are calculated using amounts from the Allocation worksheet multiplied by the percentage applicable to the particular beneficiary (percentage is on the Beneficiary worksheet).
The information on the Beneficiary worksheet transfers to the T3 and NR4 slips. These slips are for reporting and preview purposes only, as data can't be edited on these forms.
The data from the T3 and NR4 slips is posted to the T3 Summary and NR4 Summary.
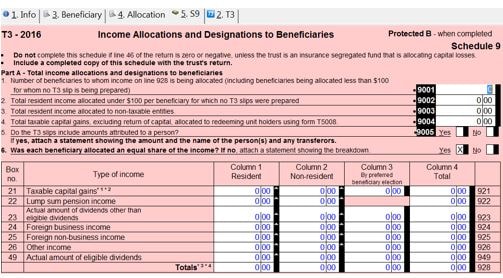
Schedule 9 is a summary of the amounts allocated/designated to the beneficiaries. ProFile completes this form using the amounts from the Beneficiary worksheet. The trust gets a deduction for the total income allocated to beneficiaries at line 928 of this schedule.
Review the T3 jacket and manually enter data into any fields not automatically calculated by ProFile T3, especially the questions on the first two pages.
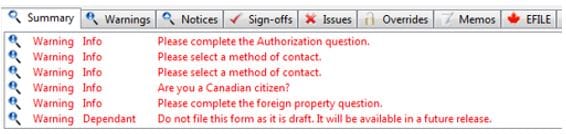
Using the Active Auditor in ProFile
Active Auditor in ProFile shows messages linked to your data file. You’ll see audit messages, notices, processing errors, overridden fields, memos, review marks, and EFILE-related messages.
Error messages or errors that may restrict processing the return display in red text.
Accessing the Active Auditor
The Active Auditor can be accessed in two ways:
- Select Active Auditor in the top toolbar menu

- Right-click on any form, and then select Show Auditor from the menu
Selecting Active Auditor options
Note: Setting the Active Auditor options in one location applies the settings for all modules.
- Open ProFile.
- Select Environment from the Options dropdown menu.
- Select Audit. The audit option window will display.
Each section of the audit options window has pre-set default selections.
Note: Modules may display different tabs in the Active Auditor based on the nature of the module itself, rather than settings.
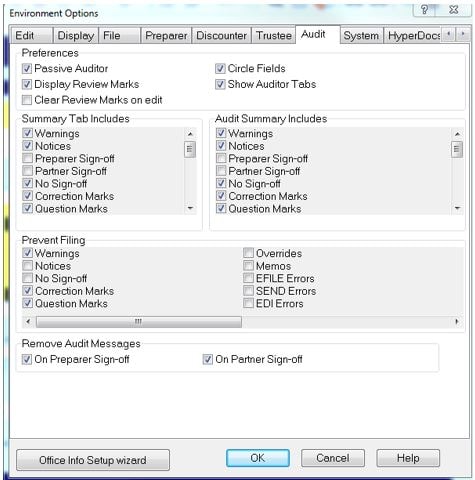
Preferences settings
The Preferences section of the Audit tab includes settings that affect the display of warnings.
Note: ProFile recommends the Show Auditor Tabs option be selected to provide the clearest feedback and indication of errors on forms.
Summary Tab Includes settings
The Summary Tab Includes section of the Audit tab includes options that display in the auditor toolbar. Each of the selected options displays related errors in the corresponding Active Auditor tab.
Prevent Filing settings
The Prevent Filing section of the Audit tab includes options that halt the filing of the form. Errors created by the violation of these options must be cleared before filing can take place.
Remove Audit Messages settings
The Remove Audit Messages section of the Audit tab includes options as to who can remove errors in the Active Auditor for a form.
Note: for best results, select at least one of these options. If you skip them, you won’t be able to clear Active Auditor errors or finish filing.
Clearing Active Auditor messages
Error messages display as red text in the Active Auditor tabs.
- Double-click on an error warning in the tab. The error circles in red on the form.
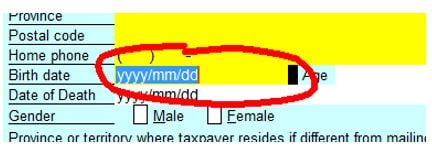
- Resolve the error. The details for the specific error are in the tab.
Sometimes, ProFile flags something as an error, even if it’s actually fine for you or your client. For example, an RRSP amount might work for your situation, but ProFile marks it as outside the CRA’s usual range and calls it an error.
In such cases, the individual selected in the Remove Audit Messages section of the Audit tab can sign off on, or approve, the error.
Attaching tapes in ProFile
Using ProFile, preparers can attach tapes to the field. Attach Tape functions much like an adding machine that performs and records calculations.
Tape options are managed in the Options -> Environment -> Edit tab in ProFile.
- Open a file in ProFile.
- Select a field to attach a tape.
- Right-click and select Attach Tape from the menu. The Tape window will display.
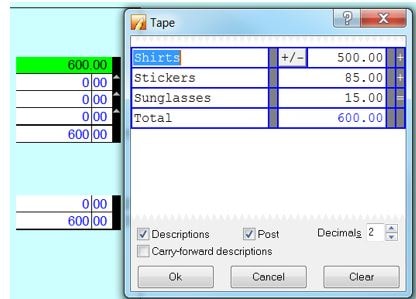
- Enter a description into the left-side field of the table. Enter a value into the right-side field of the table.
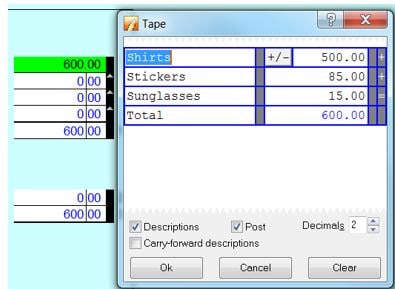
- Press Tab to cycle through the fields and start a new row.
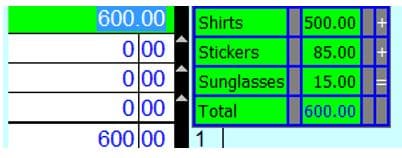
- Press . The total is calculated and inserted into the selected field on the form.
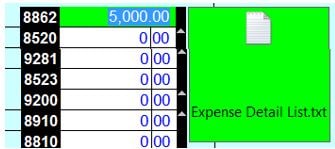
The background colour of the field changes to green when a field has a tape attached.
Note: Only the total from a tape is included with the tax return. The entries and descriptions are for your reference as the preparer.
Clearing an Attached Tape
- Open the file with the attached tape in ProFile.
- Select the field from which an attached tape is to be cleared.
- Right-click and select Attach Tape from the menu. The Tape window will display.
- Select Clear. The tape will clear.
- Select OK. The window closes and the tape clears from the field.
Copying a Tape from One Field to Another
- Open the file with the attached tape in ProFile.
- Select the field with a tape attached.
- Right-click and select Copy Memo/Tape from the menu.
- Select the destination field for the copied tape.
- Right-click the destination field and select Paste Memo/Tape from the menu. The tape attaches to the destination field.
Note: When pasting a tape to a destination field, the value of the destination field will be set to the total in the tape. If that destination field is also a calculated field, ProFile sets the override flag on that field.
Attaching memos in ProFile
You can add memos to any field on ProFile forms. Memos work like sticky notes, letting you leave messages or reminders for partners or reviewers.
Note: Memos don't print or transmit over the internet with a tax return file, or affect the calculation of a return.
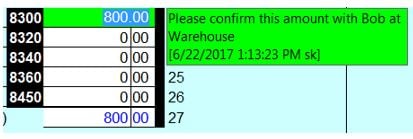
Memo text displays in a pop-up window when hovering the move the pointer a field with a memo. Fields with attached memos also appear in the Memo and Summary tabs in the Active Auditor.
Attaching a memo
- Right-click in a field and select Attach memo from the menu. The Memo window will display.
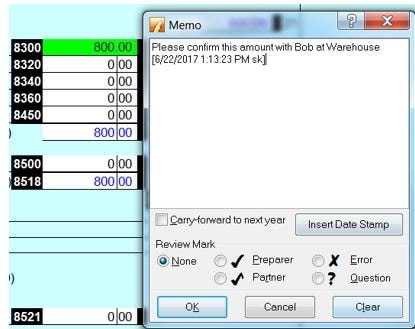
- Enter the memo content into the text field in the Memo window.
- Select OK.
The memo attaches and the colour background of the field changes to green.
Clearing a memo
- Right-click in a memo field and select Attach memo from the menu.
- Select Clear.
- Select OK.
The memo text clears from the form field.
Attaching HyperDocs in ProFile
With HyperDocs in ProFile, you can attach multiple documents—any format—to a form or field in your return.
Note: HyperDocs are stored with the preparer files, but are not included with T1 EFILE or TP1 NETFILE transmissions.
- Open a form in ProFile.
- Select the field to attach a HyperDoc.
- Select File, and then HyperDocs. The HyperDocs window will display.
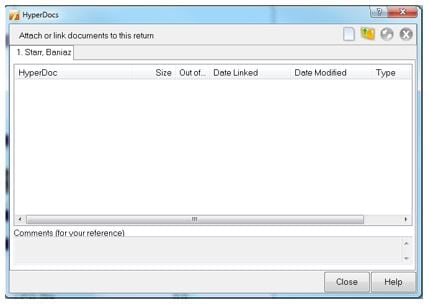
- Select add.
- Navigate to the location of the document to attach.
- Select the document, and then select OK. The options window will display.
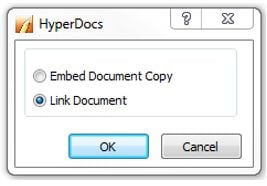
- Select one of the options presented:
- Embedded documents open in a read-only state and can't be edited in ProFile.
- Linked documents open from the source and can be edited in ProFile. Any changes are saved in the source document in the file location.
- Select OK. The document attaches to the field as a HyperDoc.
The field displays in green colour, indicating the HyperDoc attachment.
Detaching HyperDocs from a field
- Right-click on the field with the attached HyperDoc.
- Select Detach HyperDoc from the menu.
The document detaches and the field restores to its default colour.
Note: The document remains attached to the form, but isn't linked to a specific field.
Removing HyperDocs from a form
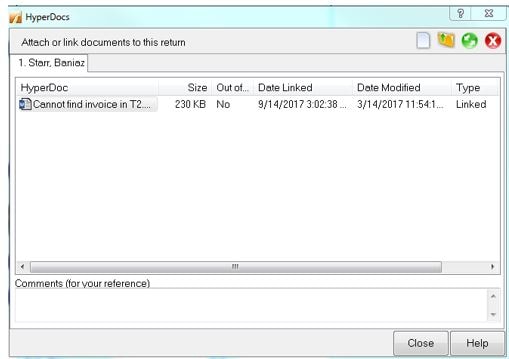
- Select the Hyperdocs from the File dropdown menu. The HyperDocs window will display.
- Select the document from the HyperDoc list of attached documents. The red X logo in the top-right corner activates.
- Select the red X logo.
- Select Yes to confirm the removal of the document.
The document detaches from the form.
More like this