Create a PDF file in ProFile
by Intuit• Updated 1 month ago
- Open the file.
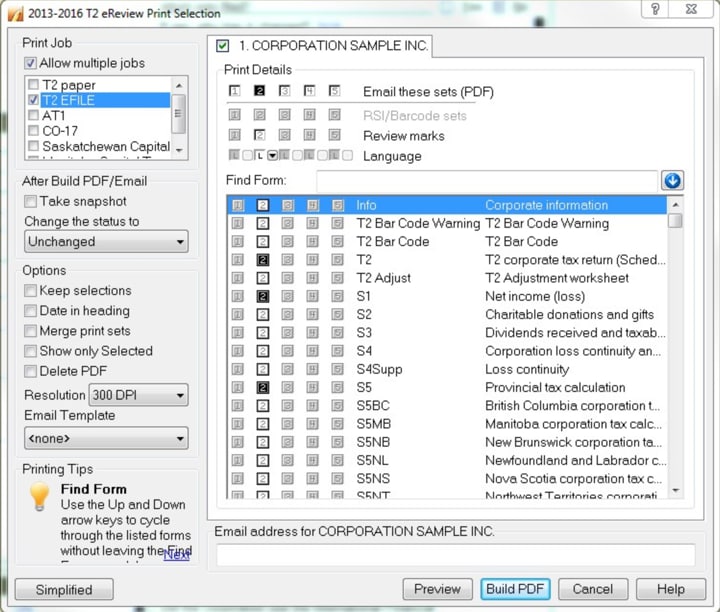
- Select Print/Email PDF… from the File dropdown menu. The eReview Print Selection window displays.

- Select the set of forms to include in the PDF from the Print Job section.
- Select the individual forms and documents to include in the PDF from the Print Details section.
- Set any additional options for the PDF file:
| Resolution | Selects the DPI (dots per inch) for the PDF.
A smaller DPI creates a smaller the file. However, the images and graphics are not as crisp. A higher resolution provides crisper image detail, but also increases the file size. |
| Delete PDF | Erases the PDF from your local computer after you send it. |
| Email Template | Selects the template that you want to use for the email message or cover letter for the PDF file. If you have a customized template saved as an RTF document, select Browse to search for and add that template to the available list. |
| Email address for (client) (optional) | Provides space to enter the email address where the PDF file will be sent. Tip: ProFile automatically populates the email address from the Info form. When you enter an email address, the Build PDF button changes to Email. If you do not enter an email address, ProFile does not email the PDF file. If you want, you can retrieve the PDF file later and email it manually. |
| Preview button (optional) | Allows you to preview the PDF file before you send it. |
| Email or Build PDF | Creates the PDF and (if you are emailing the file) creates the email message. This launches your email program and creates a new message. Currently this feature is only supported in desktop versions of Outlook 2010 and later. PDF's can still be sent via your mail program's attachment function. Select Send on the message window to send the PDF. |
- Select Build PDF.

The PDF is created.
Location of created PDFs
ProFile stores the created PDF file in the same directory as the returns and files being worked on. To view this directory configuration:
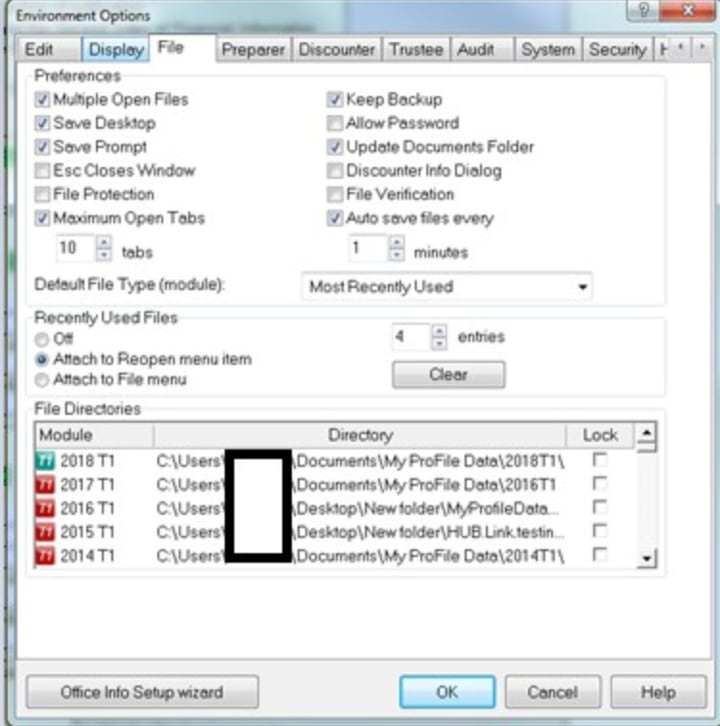
- Select Environment… from the Options dropdown menu in the top toolbar. The Environment Options window displays.
- Select the File tab.

- Review the directory options for modules under the File Directories section.
- By default, the directories are in the Windows Documents folder, under My ProFile Data[MODULE].
- For example, files printed from the 2022 module for ProFile FX are created in the directory My ProFile Data2022FX
More like this