Using Intuit Sign in ProFile for electronic signatures
by Intuit•1• Updated 5 months ago
Electronic signatures (or eSignatures) let accountants ask their clients for signatures and other inputs on forms and documents in ProFile.
ProFile customers can see requests that have been completed and ones that are still missing in one easy-to-use dashboard, after requests have been sent.
Intuit has a proprietary eSignature solution called Intuit Sign. An Intuit Sign license lets you ask for signatures directly from ProFile without having to track individual emails or files. To use Intuit Sign, you will need a T1, T2/CO-17,T3, or Federal Tax Suite ProFile license, as well as the Intuit Sign license.
Features of Intuit Sign include:
- Signed signatures with time stamps and authentication certificates to ensure compliance.
- Multiple signers on multiple documents (spousal).
- Ability to drag and drop signatures onto any PDF that has been uploaded.
- Seven years of online cloud storage.
- Ability to store, track, and download client documents.
- Set reminders and expiry for documents to be signed.
- No account creation for your clients, just a one-time access code for your clients.
- Track client requests status in a dashboard.
Note: Intuit Sign for ProFile doesn't work with trial, OnePay, or ProFile 20 licenses.
Table of contents:
Activating Intuit Sign
- Go to this web site to purchase the product Intuit Sign for ProFile. A receipt containing the product license key is emailed after a purchase.
- Open ProFile.
- Select Help from the dropdown menu in the top toolbar, then select Manage Licenses, then Add New.
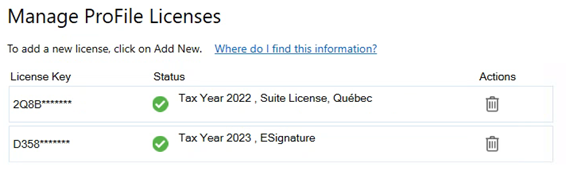
- Enter the license key and select Activate when prompted.
The Intuit Sign license confirmation displays.
Using Intuit Sign
- Open ProFile.
- Select File from the dropdown menu in the top toolbar.
- Next, select eSignature, then Connect
If you aren't signed in, you will be prompted with a screen for Intuit Accountants. Enter your credentials or create an account when prompted and follow the sign in instructions.
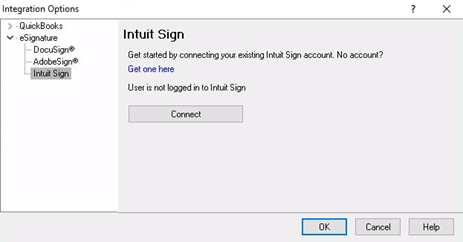
- After logging in, an Integration option window will open.
- Select Intuit Sign under the eSignature list options.
- Select Connect, then OK:
Under the File menu, two options are available:
- Collect Signature or:
- Dashboard
Note: To switch between eSignature providers, select Options then Integration, then go to the provider of your choice, and select Connect.
Collecting signatures
- Select the File dropdown menu in the top toolbar.
- Next, select eSignature and then Collect Signature.
The Request eSignature window displays, providing a list of documents that can be selected to be sent to the client:
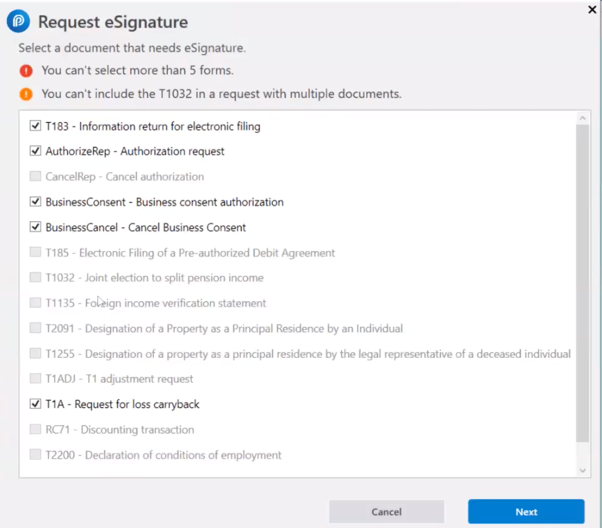
Note: Currently you can select and send five forms at a time from the form list. The one exception is for the T1032: If you select this form, it's the only one that can be sent with that submission.
- Select the form(s) that require a client signature.
- Select Next.
- A Signature request window will appear.
- At this point, you can select the Upload Documents button.
You can only have a combined maximum of five documents included in a request (Preselected and Uploaded).
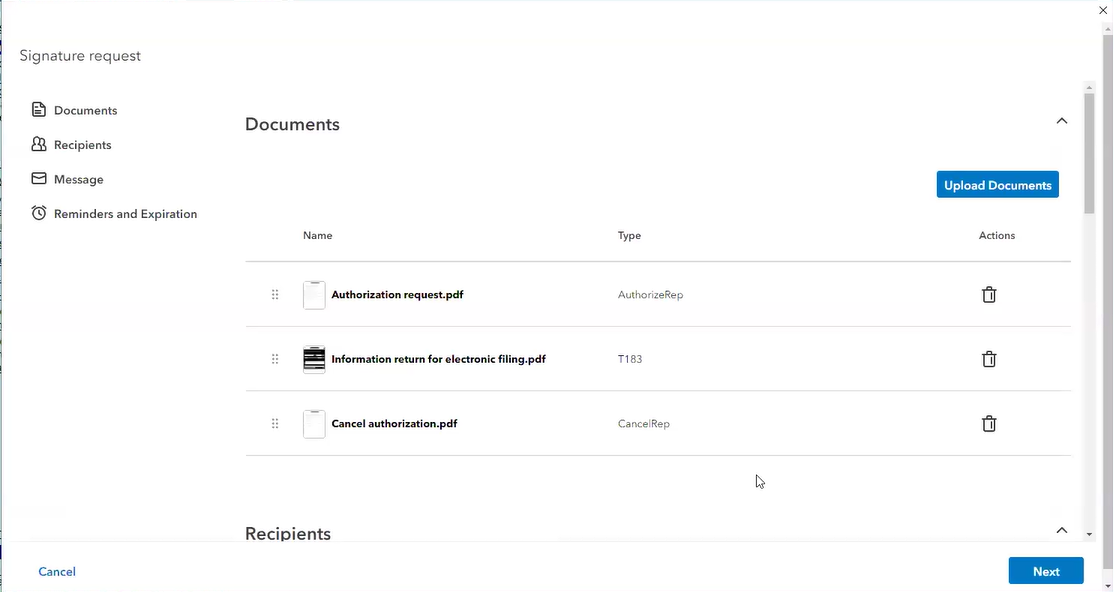
There are four collapsible components on this screen:
- Documents
- You can upload, re-order, and, or delete documents
- Recipients
- You can choose from two verification methods, Access code or Mobile OTP that is auto-generated, or manually inputted. An access code must be 6 to 9 digits and will need to be shared with the recipient via Mobile or SMS.
- Message
- This is the section where an auto-generated template email will be populated. You can manually edit this email.
- Reminders and Expiration
- You can choose an expiration date for the signature request (maximum 60 days), as well as when you want to schedule any follow-up reminders.
- Select Next, a preview screen will appear showing you where on the documents the client would need to sign.

Optional: If you uploaded a PDF document, you can add a Signature, Signing date, or a Text box by dragging and dropping it onto the form.
- Select Next, a Review page will appear.
- Select Send, if you're satisfied with how the Review page looks.
A signature request notification will appear.
Verification methods for Intuit Sign
There are two verification options for Intuit Sign, Access codes, and Mobile OTP. We recommend using Access codes because they are more reliable and have less restrictions.
Access codes
An access code can be auto-generated, or manually inputted. An access code must be 6 to 9 digits.
Once the access code is created, it will need to be shared with recipient, preferably via Mobile or SMS.
Canadian mobile carriers supported with verification for Intuit Sign
We support three major mobile carriers and their subsidiaries, including Bell, Rogers, and Telus.
This section will be updated when more subsidiaries and carriers are made sure to work with Intuit Sign:
| Wireless Carrier | Accepted Subsidary |
| Bell Mobility | • Virgin Plus • Lucky Mobile • Bell MTS • Bell Aliant • Northwestel |
| Rogers Wireless | • Fido Mobile • Chatr Mobile • Cityfone • Primus Wireless • Zoomer Wireless • SimplyConnect • Shaw Mobile |
| Telus Mobility | • Koodo Mobile • Public Mobile • DCI Wireless |
Note: Freedom Mobile, SaskTel, and Vidéotron aren't currently supported Mobile OTP carriers. You can still send an Access code with these carriers.
Collecting T1032 signatures
Note: When collecting the T1032 signatures, you cannot collect any other signature from the return at the same time. Complete the T1032 before requesting more signatures.
- Create a coupled T1 return.
- Enter the taxpayer's information.
- Complete the T1032 form.
- Select who is transferring the pension on the T1032.
The transferring taxpayer becomes the primary and ProFile will transmit the request for eSignature to this taxpayer first. Once they have signed it and sent the document back to the preparer, ProFile will automatically send a copy to the taxpayer receiving the transfer to sign and return to the preparer.
Gathering client signatures: the client's experience
For access code authentication: enter the code.
For mobile authentication: The client's name and address used in the request must match the name and address found on the client's mobile carrier's billing statement.
Once you have submitted your request, your client receives an email from Intuit Sign notifying them that they need to electronically sign the document.
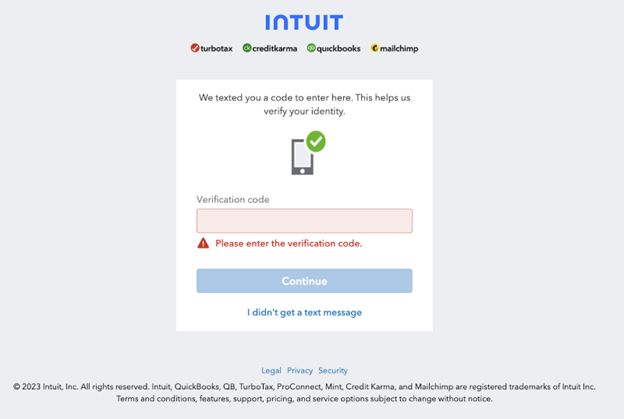
- Once they select Review and eSign, the client is taken to Intuit’s secure portal. A one-time passcode is sent to their mobile device number, which the client enters in the Verification code field and then selects Continue.
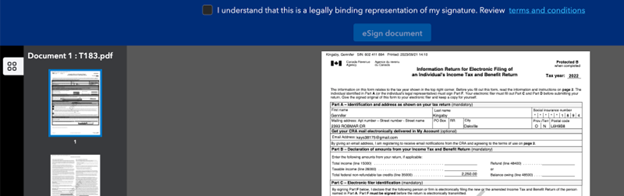
- The client is prompted to acknowledge that this is a binding document.
- The client selects the acknowledgement checkbox and selects eSign document.
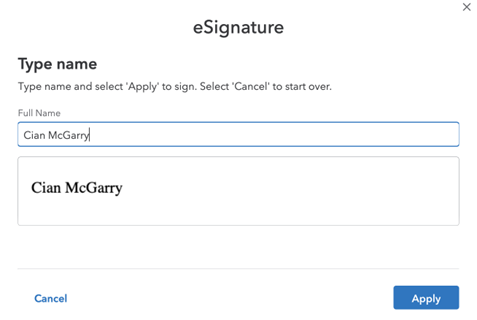
- The client enters their name and selects Apply. The signature is displayed on the document.
- The client selects Send.
- After the client submits the return, the status in the dashboard automatically updates.
Using the eSignature dashboard
The eSignature dashboard contains all the information you need to track the progress of your requests.
Select eSignature under the File dropdown menu in the top toolbar, then select Dashboard.
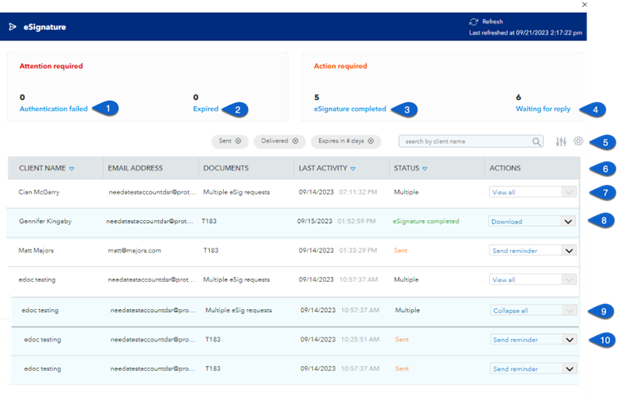
The following values are displayed in the dashboard:
- Displays requests that failed to authenticate on the dashboard.
- Displays expired requests on the dashboard.
- Displays completed requests on the dashboard.
- Displays requests waiting for signature on the dashboard.
- Customizable filter and column configuration.
- Actions: view or select the request status.
- View all indicates multiple eSignature requests. Select this to expand and display all requests.
- Download will download a PDF copy of the signed form and Summary - Electronic Signature Certificate.
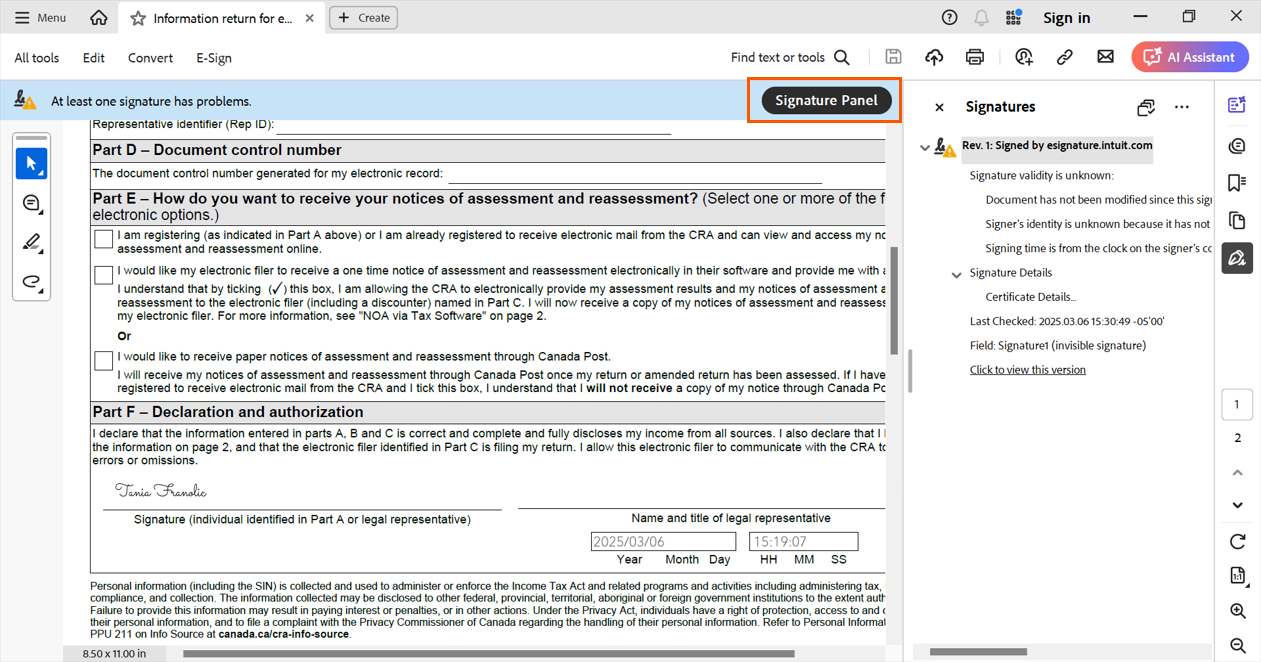
If you're opening your downloaded, and signed documents you may see a message that says 'At least one signature has problems.' To solution this problem, see the section below.
- Collapse all hides all requests associated with the document.
- Send reminder sends an email reminder to your client.
Once your client has signed the documents, you will need to enter the date and time (where applicable) on the corresponding form in ProFile.
Resolving the 'At least one signature has problems' error
Note: These steps will only need to be done once to resolve the issue for all signed PDFs.
- You can resolve this by selecting the Signature Panel button. This will open a drawer on the right-side, expand the message in the panel.
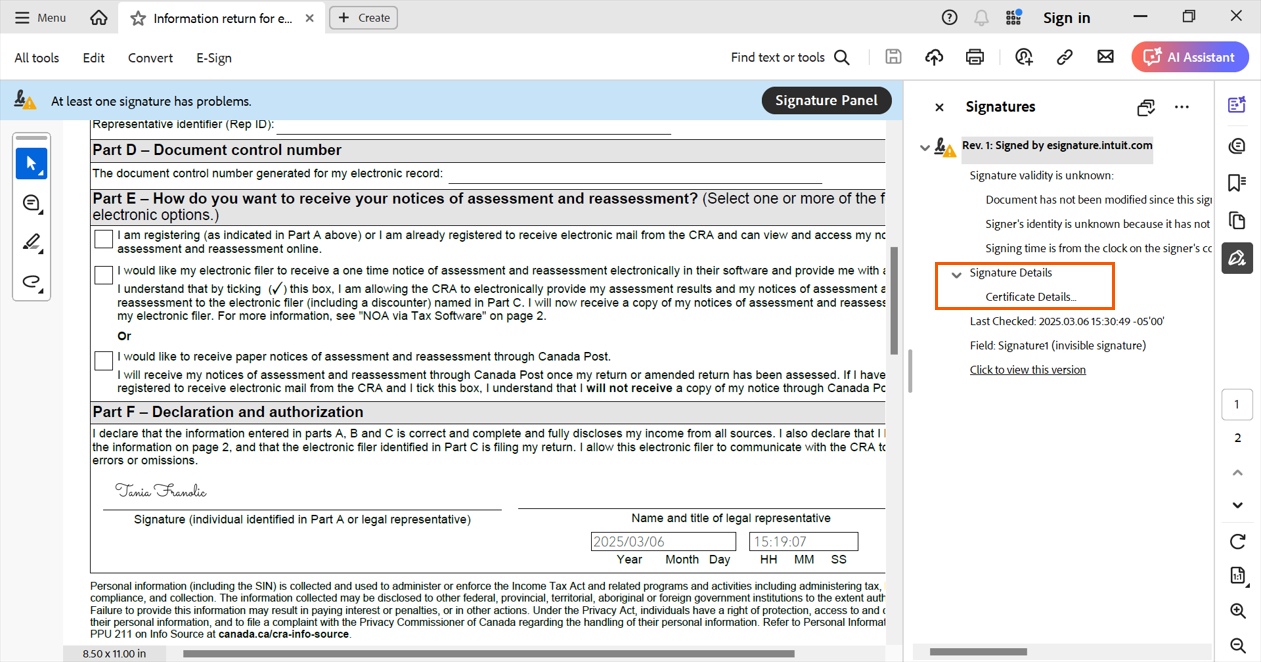
- The second section, titled Signature Details, needs to be expanded. Select Certificate Details
- A new window will appear called Certificate Viewer. In this window, select the Trust tab. Next, select Add to Trusted Certificates...
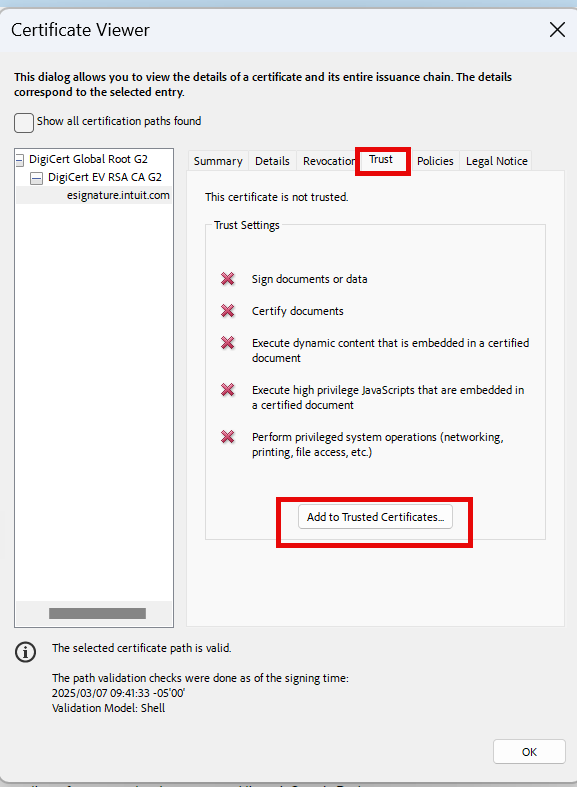
- An Acrobat Security window will appear. Select OK.

- Finally, an Import Contact Settings window will appear. No adjustments or modifications are required. Select OK.
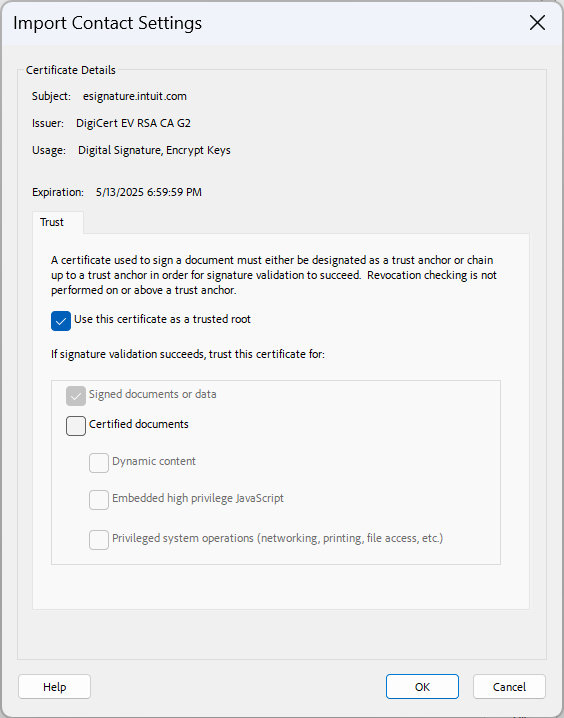
You should now see a success banner that says 'Signed and all signatures are valid'.